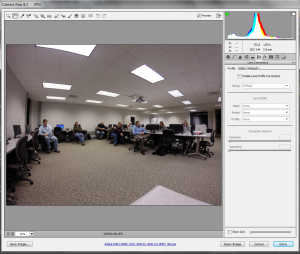
Now that I have been working with my GoPro camera for a while, I have noticed that the lens typically causes a fish-eye effect on photos. It also seems to have some chromatic aberration (not all colors are focused at the same convergence point). I thought readers might be interested in how I can correct these details using Camera Raw (open folder in Bridge, then File > Open in Camera Raw…). First, let’s examine the raw image (pulled directly from the micro-SD card and opened in Camera Raw). This particular photo was taken before the start of our January Adobe User Group meeting (those who arrived early were watching me set up the GoPro app on my iPad). If you want to see the details, you can always click on the image to enlarge it. The first problem is the obvious warping of the ceiling.
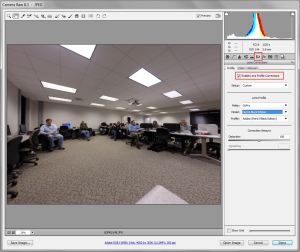
To correct this warping, I selected the lens correction tab and enabled lens corrections (highlighted areas in the image below). Notice that the ceiling is much less warped. Of course, this correction means that some of the people are a bit distorted. One can make custom changes to find the appropriate balance (of course, the GoPro camera lens is set to give as wide a field as possible so there are limits to the corrections one can apply).
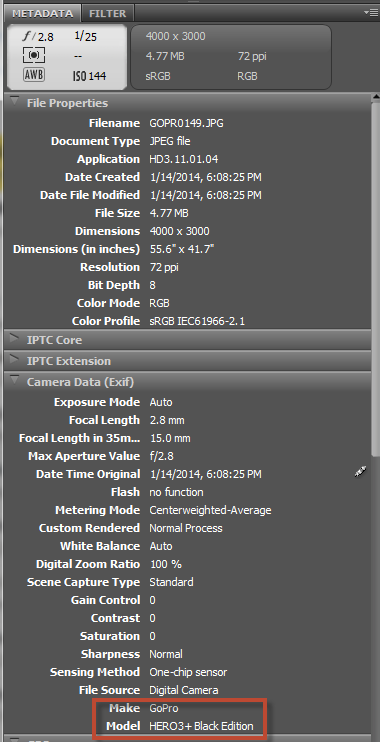
For those who are observant, you may note that the type of lens was detected and the appropriate corrective distortion selected. How did Camera Raw know the type of camera which was used? The answer lies in the associated metadata. Every image has a lot of information about the camera and image itself. This is easy to read in a tool like Adobe Bridge. Note some of the details shown below for the selected image. If the camera had GPS capabilities, the latitude and longitude where the photo was taken would also have been included. It is precisely this sort of information one may want to remove before posting photos to the WWW (otherwise, people know exactly where you were when the photo was taken – perhaps you don’t want people to know about that).
As you see, there is a wealth of information about the camera settings and photo.
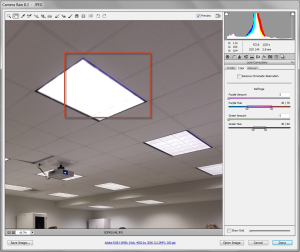
The other main problem is the chromatic aberration (seen when one zooms in on the light fixtures). In the highlighted region below, you see a blue tint to the edges of the fixtures. To correct this, we have to adjust the chromatic aberration.
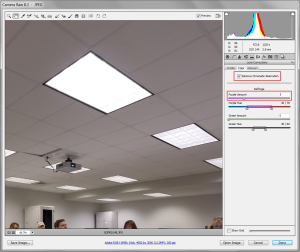
Within the lens correction area, I selected the color tab and enabled the check box. I also adjusted the purple slider (see below). The aberration has now been removed.
I hope the above overview helps you better understand how to modify images taken with certain cameras before you post the image online. In Camera Raw, one can open a number of images, select all, and apply effects (such as the lens correction). I encourage you to experiment with these tools using images you have taken. As always, I look forward to your comments.
