On Monday, August 1, 2011, Adobe made a public version of their Edge animation tool available via Adobe Labs. I thought it might be helpful for readers to have an introduction to some of the fundamentals regarding the use of this tool. First, go get a copy of Edge at the above link. Download the file, unzip it locally and run the Setup.exe program (I am assuming you are using a Windows machine for this discussion – if you are using a Mac, do the corresponding task). while that is going on, also download the sample files (at the time of this writing, there are 4 samples). [Ferris Wheel – most impressive, Getting Jumpy, Rich Ad, and Sunshine Sailing].
Once you have successfully installed Edge, you will likely see the following message. Not a big deal, but you should be aware that this is a temporary trial and will eventually expire. As the note says, you will not see this message again.
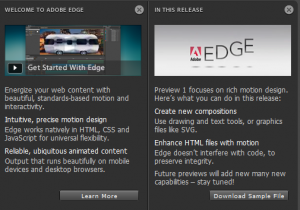
Once you have clicked “Ok”, you will have the choice of learning more or working with the sample files (which you already should have downloaded).
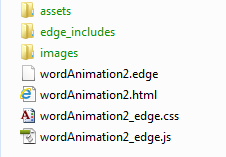
For our initial purposes, we will examine one of the starting files (and then build a simple animation on our own). For our initial analysis, I plan to examine the “Getting Jumpy” animation. Note that there are several files (one with a .edge extension, another with a .html extension and so forth). Obviously, the .edge extension is to be used with the editor; the other files are for deployment (I recommend also keeping a copy of the .edge file with the others as you deploy them so you can make changes as the product is improved over time).
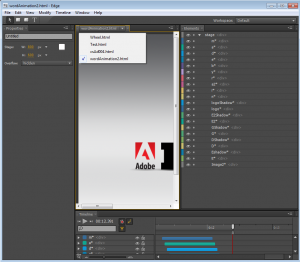
If you open the .edge file in Edge, you will see a screen like the following. Note that even though one opens the .edge file, the tab indicates the .html extension. The entire interface is shown below (you might want to right click on the image (and open in a new browser tab) to see a better view). There is a central stage where the animation displays (simply click the space bar to preview the animation). You can also have multiple files open at once (note that I clicked on the drop down triangle adjacent to the file name to show that I have 4 files presently o Near the top, there is a menu and a set of initial tools (selection, rectangle, rounded rectangle, and text). I suspect future versions may include additional capabilities. Directly to the left of the stage is a properties window. To the right of the stage is a list of elements and directly below the stage is the timeline.
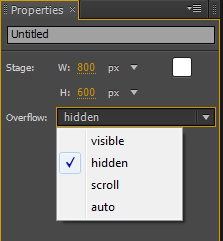
Let’s examine the properties panel in a bit more detail (below).
Note that since the entire stage is initially selected, one only sees the properties for the object. Click on other objects on the stage to see their properties. Note also that the title of this document is “Untitled.” Anyone who has worked with me knows this is one of my pet peeves. I recommend immediately changing the name from untitled to something more meaningful. This is what will appear on the title bar in the browser. note also the size of the animation and the CSS choices on what to do with content which goes beyond the boundaries. We will just leave those as they are for now.
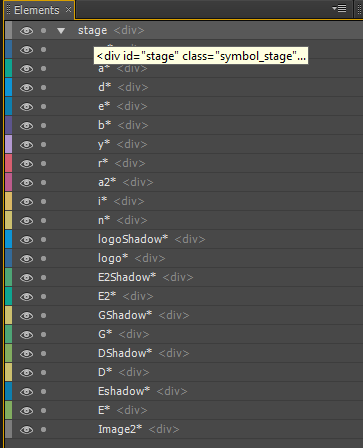
Let’s next examine the elements panel (below).
Keep in mind that this tool is generating HTML code so all the divisions will be named as shown in the panel.We can click on the eye symbol to hide or show items and we can click on the adjacent dot to lock items. Although I do not recommend changing items, one should be aware that the main container (stage, in this case) represents a division within the HTML document (see code snippet below).
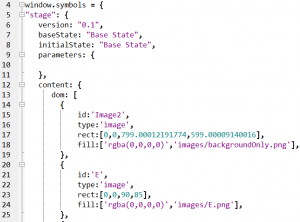
But, I see a whole lot more <div> elements listed. these are loaded dynamically via the .js file (which is why jQuery is also required in the edge_includes folder). Let’s just examine a bit of the JavaScript/ jQuery code which is used to dynamically create these objects.One can click on the image below to read (or, better – view the source code or look at your own examples).
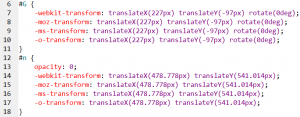
Anyone familiar with jQuery should recognize the above syntax. These objects are also styled with CSS (shown below). As with the screen capture of the JavaScript, one can click on the image below to see it in more detail (or better, look at the source code).
Note that browser specific prefixes are employed throughout. I do encourage readers to examine the source code of what is generated (as it can be rather complex). This is also a great argument to using the native Edge tool to make any subsequent changes to the animation.
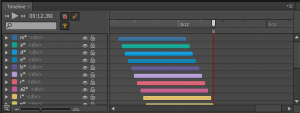
Lastly, we should also examine the timeline. A screen capture is shown below.
The funnel is active so we only see animated elements. The keyframe animation is also active. One is able to search for selected elements and one can also zoom in or out on the timeline (near the bottom of the image above).
Adobe provides some good starting resources so I just wanted to give an introduction to this tool. I think it has some great possibilities. I believe this also demonstrates a willingness on Adobe’s part to offer native HTML animation tools (as an alternative to Flash). Frankly, as I have said many times, one should use the proper tool to solve a given problem. Flash may (or may not) be the answer, the HTML5 <canvas> element may (or may not) be the answer, and animations done in jQuery and CSS may (or may not) be the answer. However, we now have another tool we can employ as needed. I encourage you to try it out.
Note that the CSS validator will choke on the CSS files (since many take advantage of browser specific prefixes for certain behaviors – such as transforms). The HTML will tentatively validate as HTML5. Note that although the <!DOCTYPE> evaluates as HTML5, most of the features of Edge are done with CSS and JavaScript/ jQuery. Overall, I have been quite impressed as I begin working with this tool. I hope to post some of my own examples relatively soon (however, they will not be nearly as complex or exciting – most readers know I am graphically challenged).
For those who are interested, here are working examples of each of the sample files provided by Adobe (with some minor modifications – such as a proper title). Each of these examples will open in a new browser window/ tab. Note that some of these may take a moment to load (depending on your connection speed) – there is a fair amount of CSS and JS associated with some examples. Lastly, don’t forget to view these examples in various browsers (ranging from Chrome and Safari to Opera and Firefox and Internet Explorer).

