In my last weblog post, I focused on an overview of the Adobe Web Design MOOC which I recently taught. In this post, I thought I would focus on the technologies employed. One insight which came through loud and clear is that one must be highly fluent with a number of technologies. Obviously, this includes the technology being taught. However, there are many other supporting technologies which one must also be very competent with. I can not stress this enough – you must be able to anticipate any issues which may arise and have alternate approaches ready. One must also have a very robust and reliable network. Sadly, I was unable to run any of these sessions at school because of this last fact. I wish some of my current students could have seen what was involved in the development and presentation of course materials. Let’s focus on some of the technologies employed.
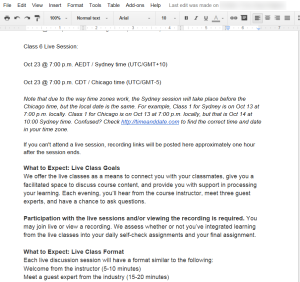
First, we needed to decide upon who was responsible for what. We needed to communicate and to include comments. Google docs seemed a likely choice as we started drafting materials. Since this course was under the auspices of a company, appropriate individuals needed to review the content and confirm it was appropriate and properly worded. Keep in mind that the instructors were located in timezones on nearly opposite sides of the planet. Therefore, development of many materials and comments on those materials were done asynchronously. Obviously, if there was a pressing issue, email or other more immediate communication means were employed. As you saw in the last post, we also used Google maps to highlight where course participants were located. Here is what the initial document looked like in Google docs.
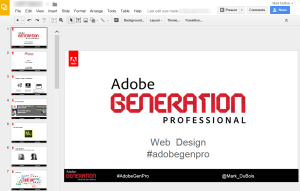
We also put together some slides for use in various parts of the class (including live sessions). Again, we used Google docs to accomplish this. Here is an example of how the slides appeared under development.
Of course, we also used MS-Office (I used versions 2010 and 2013) on various computers at home. Various documents were downloaded for modification and offline review.
From a project management perspective, we relied on BaseCamp. This allowed us to collaborate as needed on other aspects of the project. For example, there was an initial deadline for completion of all materials. There were a number of milestones and thoughts which needed to be tracked.
The Adobe Education Exchange was used as the means of providing all class materials, collecitng assignments, tracking discussions, and assigning badges upon successful completion. This is a proprietary environment. I did not have direct access which meant that my materials had to be posted by others. I found this to be a good intermediate step to confirm that all was proper before going live. Not only was proof reading involved, but there was also a check for reasonableness and flow from one topic to the next. Frankly, I wish I had someone who would perfomr this function in my Moodle environment.
To prepare the supporting materials, I relied on a number of technologies to develop appropriate videos (on average 5 minutes or less with a focus on a specific topic/ task). I posted these on my Vimeo account (where I could track overall use of these videos). The technologies I used included Captivate, Camtasia, and SnagIt. I have found this combination of tools very helpful to quickly develop videos for students.
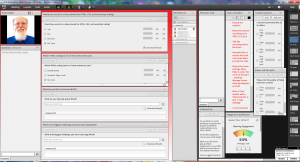
Once class was live, we had live sessions at both Chicago and Sydney times (7 p.m.). We relied on Adobe Connect for this. We found it helpful to have a set of notes we could refer to at the start of each session (such as consistently naming each recording). We also set up a number of different layouts so that US and ANZ polls were available at the appropriate time. I have included a screen capture of the Connect session (viewed from the perspective of the instructor). You will note a number of pods and layouts which are not visible to participants.
I found it very helpful to open the Connect room at the start of the hour (rather than opening earlier). It helped everyone focus and we could immediately start recording and proceed. I generally asked a few poll questions to wait for those arriving just after the start. I also find it very helpful to have multiple computers nearby and accessing Connect. This allows me to readily see what participants see (so I don’t need to ask if they can see my screen or hear me). In a couple of instances (for example, when working with Edge Animate), I encountered a momentary snag on the computer I was using to broadcast from. I simply switched to another computer for that demo without missing a beat. Obviously, I had previously copied materials between computers (and had them also available in DropBox).
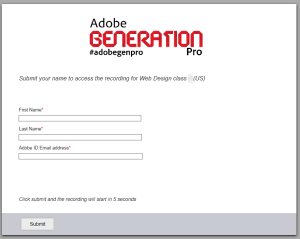
We asked everyone attending the live sessions to provide their full name (last name first) so we could see who was participating in the Attendee list in Connect. However, rather than just posting the links to the recordings, we took the extra step of using Adobe Forms Central to create a simple login form which re-directed the participant to the recording after providing their name and email). An example of the form is shown below.
Obviously, a lot of thought went into the preparation of this course. Greg has done several of these courses prior to this one and it was so helpful to have his ideas and recommended approaches as I developed this course.
Ok, now you have an idea about some of the technologies employed in the development of this course. My point behind sharing this is that there are a number of different technologies and you must be able to move freely among all of them. If I have counted correctly, I had to be very proficient in the sue of a dozen separate technologies (including MUSE itself). My point is that one needs to be very proficient/ fluent with many different means of communicating and tracking.
I hope you found this overview helpful. If time permits, I plan to also discuss completion rates, insights and overall thoughts about the MOOC. As always, I am interested in your comments.


