Over the summer, I had the opportunity to participate in a session by Andy Lauta discussing many capabilities with 3D printing and Photoshop. I was particularly intrigued by the concept that you can easily create lithophanes using Photoshop. I know you first question is probably – what is a lithophane? Essentially, these started in the early 1800s as a wax object that an artist worked with until an image was visible when the wax was help up to a light source. More details can always be found at Wikipedia. Yes, Photoshop has 3D capabilities, but I never realized how easily one could create such objects using this tool.
First, you need to obtain a set of actions from Photoshop.com. Select Download Actions after you arrive at the page I just linked. The zip file will contain a folder called Lithophane with a file called Make Lithophane.atn. You will need to place this action into your Photoshop CC 2014 actions folder. On a Windows computer, you will typically find this at C:\Program Files\Adobe\Adobe Photoshop CC 2014\Presets\Actions. After you copy this .atn file into that folder, launch Photoshop and you should see the new action visible.
To create a lithophane, you first need a suitable image. I started with my own mug. I first applied a black and white adjustment layer (it seems that colors add complexity that you don’t need for a lithophane).
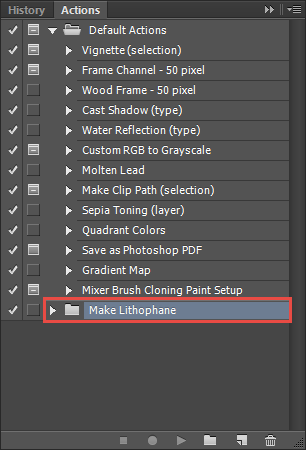
You should now be able to open the Actions panel and you should see the Make Lithophane action (actually a set of 30+ actions). You may need to load the action (just point to the location where you stored it, if needed). A screen capture is shown below.
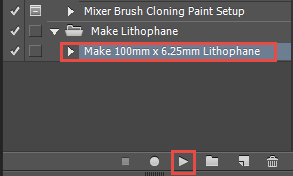
Select the action (you may need to twirl down to open the action folder) and run it.
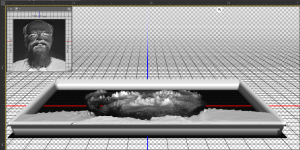
The result will be similar to what is shown below. You may want to click on the image to enlarge it.
That is it. Once you have created it, you can print it locally (I do not have a 3D printer so I use Shapeways). I print this by choosing the material and then submitting the file. I covered these steps in a previous weblog post on 3D printing using Photoshop.
Frankly, I didn’t know this technique even existed. I certainly didn’t know you could do this in Photoshop. This is part of the reason I travel to events like the AEL Sparking Creative Catalysts Summer Institute. I feel I learn so much from the people I meet.
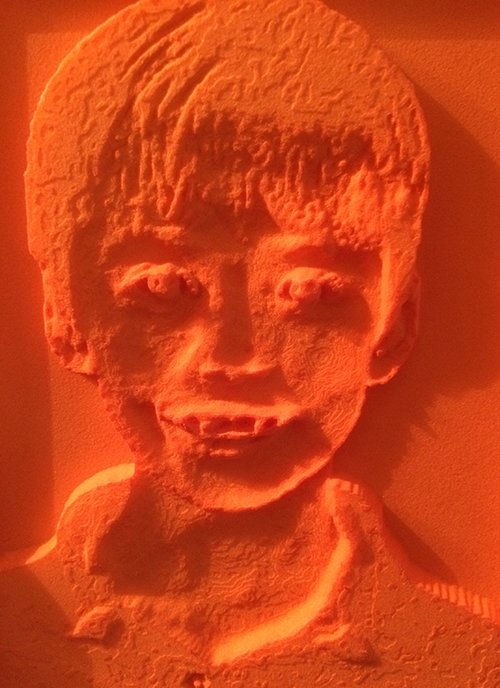
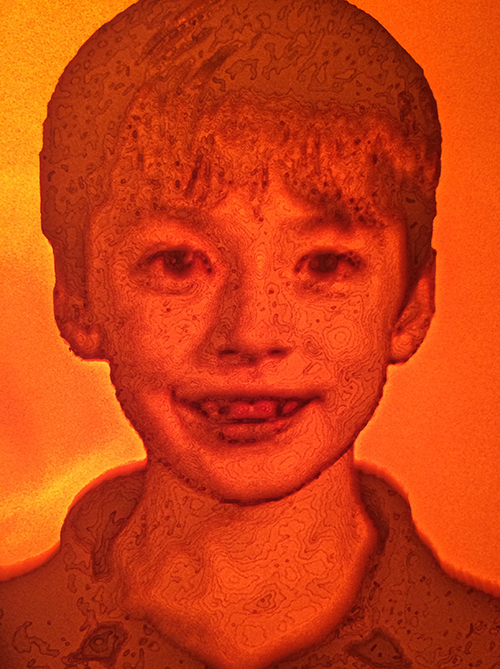
So, what do the end results look like? Here is one example (one of my grandsons). Note what the lithophane looks like by itself (below).
Wow, that doesn’t look all that great does it? However, here is the object with a light source behind it.
Personally, I think that is impressive. Yes, I am generating others.
I look forward to your comments. What do think of this technology and approach?



How can you control the dimension
of the lithophame ?
—when you need soms groter than
100 mm x 3.25 mm?–
where do you change that ?
Greetings
You control the size of the lithophane by selecting the proper image size. It is highly dependent on the image you start with. If that is 200 mm, the lithophane will be 200 mm and so forth.
You asked another set of questions (which I am combining with this answer as well).
“i am trying to do a lithophane,
but at the moment,
i receive that –for example —
“backgrounds is not available ??
Questions:
…
The “layer or background” command is not available?
Why would not all lithophane action layers be available?
From where to obtain or download the action “lithophane” for Photoshop?
From where to change the dimension of the “lithophane I need?”
To get the lithophane action for Photoshop, simply follow the link I provided. Scroll down the page and look for the actions and scripts link.
Regarding layer or background not being available, I suspect something may be locked in your image. Make certain you are working with a .psd file, not a .jpg or .png.
I hope the above helps a bit.
Best always,
Mark