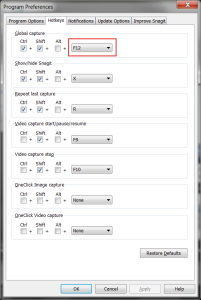
I am continuing to focus on various tools I use to help students better understand various concepts and tools. This week, I focus on SnagIt (from Techsmith). Essentially, this tool allows you to take screen captures. Ok, I already know how to use the PrntScrn key (including the Alt+PrtScrn to capture only the currently active window). Why in the world, would I need to purchase a separate product? Yes, I had those same thoughts until I won this software at a conference I attended a few years ago. I don’t know how I ever managed without it. Yes, it is that much an improvement over the PrntScrn key. I even obtained a copy for my Mac.Let’s first look at the interface. Note there is both the SnagIt tool and the SnagIt editor. I rely on both. But, before I begin, it is important to note that the PrtScrn default behavior is changed when you install the software. This means that is is “impossible” to use SnagIt as it installs to capture the necessary screens within SnagIt. The simple solution is to modify the behavior of the PrtScrn key. This is found under Snagit > Preferences. For my purposes, I changed it to the Ctrl+Shift+F12 key to capture the appropriate images. Minor point – the keys differ between Mac and Windows interfaces in the software. Since the majority of readers rely on Windows, I focus on those screens in the majority of this discussion.
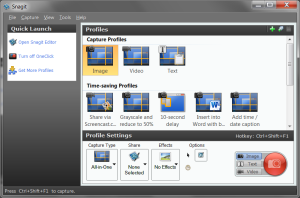
First, let’s look at the interface. You can access the tool via the system tray (it typically loads when the OS loads unless you change this during the install). As you see in the screen capture below, there are a number of options. I typically rely on capturing either images or video. However, one can use a number of presets (and can customize your own). For example, one can use a 10 second delay in the capture. This can be very helpful for those times when you need a bit of a delay.
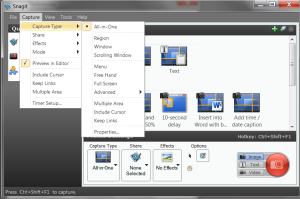
For initial discussion, I will focus on image capture and modifications. Note there are a number of options. I have left many of these at their default value.
The easiest part is to simply hit the PrtScrn key to capture an image. One can then move the cursor to a specific location and drag a rectangle to identify the part of the screen to capture. One sees the actual dimensions of the area being captured as one draws the rectangle. I find this very helpful when I am capturing an image in a virtual region (perhaps one of my Windows Server environments or a Linux server). I have the default value set to immediately open the SnagIt editor as soon as the screen capture has completed. I find the editor the most useful part of this tool.
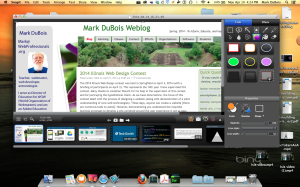
Note there are significant differences between the SnagIt editor on a Mac and the one on a Windows computer. I show both below. First, the Mac version. Note that I did a full screen capture to demonstrate this is running on my Mac. There are main tabs to the right – Tools and Effects. [You might want to click on the image to enlarge it.]
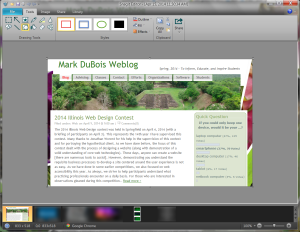
Next, the Windows version. In this case, I simply did a screen capture of the editor itself.
In both cases, you have similar tools. They are just arranged in different spots. Note that there is a clip bin at the bottom which contains your most recent screen captures (or video captures). You also have the ability to modify the image (and can save it or copy the modified version back to the clipboard).
I want to focus on some of the editor tools I routinely use. I have captured some of the ribbons below.
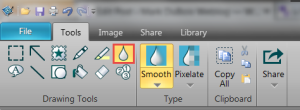
First, I often want to highlight a part of the screen capture. I typically use a red box to focus on that area. Note that I have a number of other choices. I select the desired option and then draw a rectangle. Obviously there are many other choices.
I can also easily blur a part of a screen capture. Perhaps I don’t want to share the credentials I use to connect to a database, for example. The blur droplet allows me to easily control this. Yes, I highlighted this option in the screen capture below. I typically use a smooth effect (and one can control the amount of blur as well).
I can also easily add stamps (perhaps numbered values) so I can reference these in any accompanying audio. There are a number of different stamps to choose from (and one can obtain more online).
One can also easily cut out a part of an image (perhaps a ribbon is too long or I only want to focus on a part of it). I like the various options available to accomplish this (as opposed to a simple crop). One can remove parts either in the horizontal or vertical.
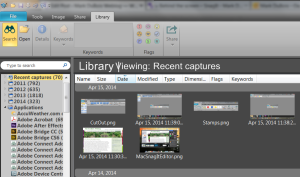
I also find it helpful to use the Library feature. It is another tab in the editor. This shows me quickly my most recent screen captures (and video files). I can also arrange them by various views.
Frankly, I find SnagIt to be a very helpful tool when I need to make a quick screen capture and then draw attention to a part of the resulting image. Those who have viewed some of my tutorials or introductory topic videos may have noticed some of these images.
Yes, there are many other features and capabilities. I just wanted to introduce you to this tool and show how I typically use it. If you want to learn more about this tool, I encourage you to obtain a free trial and try it out. There are a number of helpful tutorials which you can find as well.
I am curious if you found this introduction to how I use SnagIt helpful. As always, I look forward to your comments.
