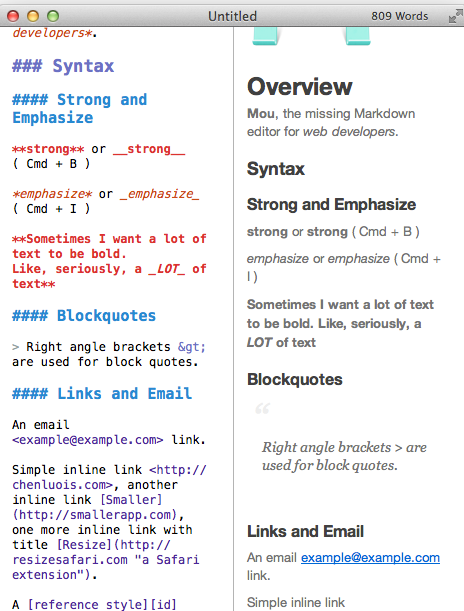
I realize that not everyone wants to write HTML. Tools like Dreamweaver make it much simpler, but there are times (particularly when taking notes) that an alternative might be more appropriate. Markdown has been around for a number of years. Essentially, you markup your document in plain text and can than convert it to HTML (or PDF or other format). For those just getting started writing HTML, you might consider using this as a starting point to better understand how the pieces fit together. I do teach web page development and design. So, why mention a tool like Markdown? Simple, it plays nice with Node.js and I am putting together several weblog posts on Node.js. Let’s first learn a little about Markdown syntax. John Gruber provides a nice overview of Markdown syntax. Essentially Markdown is intended to be easy to read and write (with a focus on readability). It can be used for formatting email, for taking notes, and for developing documentation. Not all HTML elements are included in the Markdown syntax, Additionally, block level elements must be surrounded by blank lines. If you want to experiment with Markdown itself, consider using the online test facility (dingus – love the name). Alternately, you can also work with Markdown editors on either your Mac – MOU [free for now] or Markdown Pro [$9.99] or iPad – Nocs (one example – there are others). A screen capture of MOU is shown below.
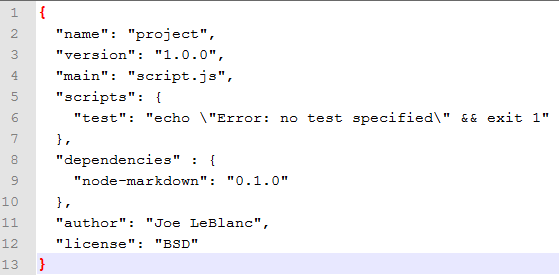
Once you are comfortable wirting Markdown code, you may want to use it with Node.js. Keep in mind in the previous post, we used npm to dynamically install an add-on module (jshint). If you are running code in Node.js, you may well want to automate the process. You can do this by creating a package.json file which contains the needed . Once you have this developed, you can use npm install to pull in the necessary modules. Consider the following example of a package.json file (this is from the lynda.com Node.js first look course). Note that you only need to run npm install once as the necessary modules will then be included in the appropriate folder within your project.
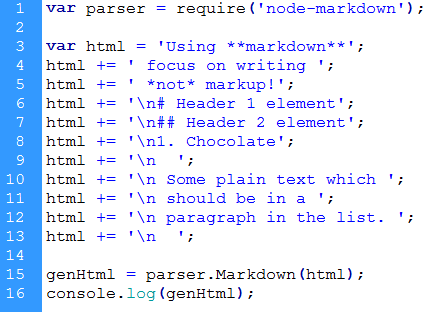
Once you run npm install, you will have an added folder node_modules (in this case containing the sub-folder node-markdown). You can then run node and point to the appropriate JavaScript file. Consider the following file and the resulting console log entries when the file is run. Obviously, one can do a lot more with Node.js. I am just giving you a starting point. I intend for additional posts which will expand on these capabilities. As you can see, you don’t need to know much HTML to generate it with the Markdown add-on and Node.js.
This is the initial JavaScript file. Note that the node-markdown module is required. Note also that I construct a long string of HTML using the appropriate Markdown syntax. I included some line break characters so you could observe the effects.
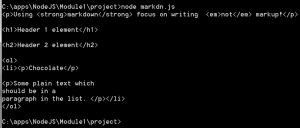
Once the string is completed, we make a call to the parser.Markdown method and pass the string called html. We then write the results to the console. The results are shown below. note what happens with the line breaks. Keep in mind that the actual displayed document on a given page will ignore the whitespace as all good browsers do. Click on the image to see the actual size (it was a bit larger than I intended for this post).
Initially, we learned how to install Node.js and add modules using npm. In this lesson, we have now seen how we can use tools like Markdown to generate HTML (if we need to). I am curious what your thoughts are about Node.js. Have you used it? Did you find it helpful?


You hit the nail on the head. I love markdown for note taking. I prefer marked for parsing markdown. It’s faster and supports GFM.