I have been traveling a great deal this summer giving presentations on HTML5, CSS-3, jQuery Mobile and the implications of mobile devices (such as smartphones and tablets) on teaching and learning. To simplify matters as much as possible, I have relied on my MacBook Pro and my iPad and Samsung Galaxy Tab 10.1 (along with several smartphones – such as my Motorola Droid 2, HTC Incredible, and iPhone). I also took my document camera (P2V from Ipveo) to a few venues in order to demonstrate the tablet and smartphone capabilities to a larger audience. As the miles increased, the weight of my equipment seemed to grow disproportionally (perhaps I am just getting older/ more tired). There has to be a better way.
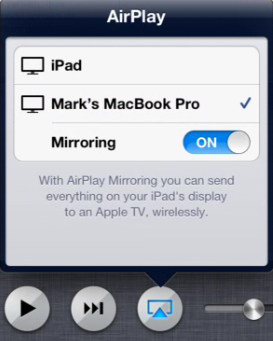
First, the iPad and iPhone world. Actually, this is pretty simple. Simply purchase the Reflection app, install it. Verify AirPlay is working on your Mac and connect. I believe this app now also works in the Windows world, but I have not tried it yet in that environment. Since I am traveling, my focus is presently on devices I am taking with me. Once you have the app installed and AirPlay is working on your Mac, you simply open the connection on your iPad or iPhone (screen capture from iPad is below; process is same on iPhone). The Reflection app must be running on your Mac (I set this to automatically start when the computer boots). Note that you must be on the same network for this to work (I tend to bring my own network using my iPhone).
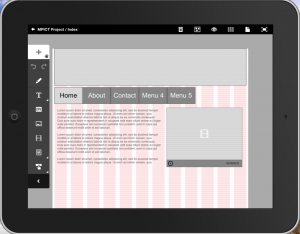
For those who don’t know,hit the home button twice, scroll to the far left of the choices. If AirPlay is working, you will see something similar to the screen capture above. Assuming all is working fine, you should then see an image of your iPad or iPhone on your Mac. Click on the image below to see a full screen version.
One nice feature is that you can customize the iPad from to black (default, above) or white.
Now that this is working, you can take screen captures for demonstrations (or capture video). I tend to use this in real time to demonstrate various emerging “best of breed” technologies (such as the Adobe Touch Apps like Proto and Photoshop Touch).
Using screen capture capabilities on Android devices is a it more complex, not impossible, just more complex. The best solution I have found so far is Java based. Therefore, it is imperative that your computer software is up to date. Click on the Apple icon and verify that this is the case (Software updates…). Now that your Java Runtime Environment is up to date, you need to download and install the Android SDK. I placed this in a folder called _apps in my Documents folder. Although I have installed this on many Windows installations, I discovered that the Mac version needs to download and install many items (such as the platform-tools folder). Therefore, you need to open a terminal window once you have downloaded and unzipped the SDK. Navigate to the location where you stored the unzipped files. I executed the following command to obtain all the necessary updates. Keep in mind you will be prompted for your Motorola developer login at one point. If you don’t have one, I recommend setting that up first at http://developer.motorola.com.
Assuming you are in the root folder of the SDK, issue the command:
tools/android update sdk –no-ui (these switches will reduce the amount of interaction you need to supply to the process).
The above process will take some time (and you will need to login to your Motorola Developer account (follow the prompts). I did observe that the password is displayed and appears to be passed in plain text (bad idea – I would hope this could be improved in the future).
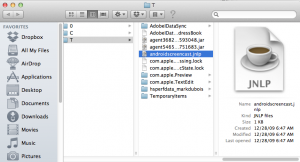
You will next need to download the Android Screencaster JNLP file. This will install deep in the Private folder on your Mac. You will also need to grant permissions for this file to execute properly (you did download it from the Internet after all). Details are shown in the image below.
If you want to see more information in the above image, just click on it to view the larger screen capture.
Assuming all installed correctly, connect your Android device via the supplied USB cable (verify you are connected in USB debugging mode), and issue the following command within your terminal session:
platform-tools/adb devices (you should see your device listed). If your device does not appear in the list, verify you are in debugging mode and that the cable is properly seated at both ends.
Assuming all is good, you next need to reference the jnlp file. Issue the command:
javaws androidscreencast.jnlp (if you encounter problems, I have found it easiest to delete the downloaded file and reinstall it).
A screen capture of both commands is shown below.
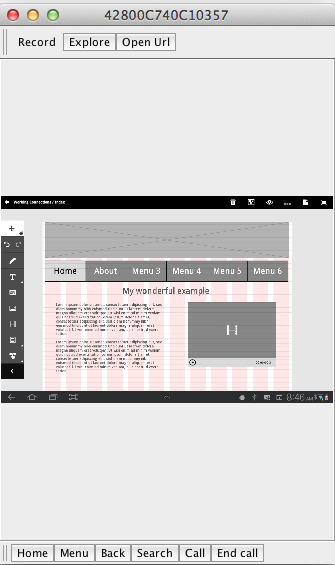
If all is successful, you will next see a small image appear on your desktop (which is your Android device) – see below.
You can then re-size the image as needed. This is shown below.
Click on the above image to see the actual screen capture.
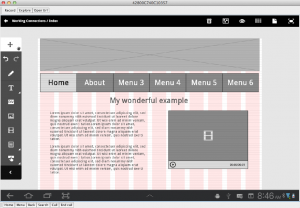
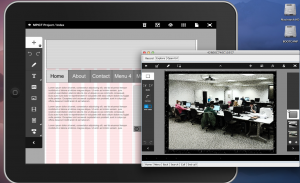
So, there you have it – you can now display both iOS devices and Android devices on your Mac desktop. In both cases, you are looking at screens which adjust as the device changes. The final result is shown below. Yes, you can run both at the same time and switch between apps as needed for your presentation/ recordings.
Again, if you wish to examine the full sized screen capture, just click on the image above to view it full size.
I would be most interested in learning what others have experienced and are using to capture the images on their devices (with emphasis on either Mac or Windows). I do have to moderate the comments as I receive a large number of spam messages. It may take me a short while to approve your comment. I appreciate your understanding on this.
